A trigger is a feature within Comm100’s Ticketing & Messaging platform, which allows you to automatically update your tickets or send follow-up emails based on predefined conditions.
Step by Step Instructions
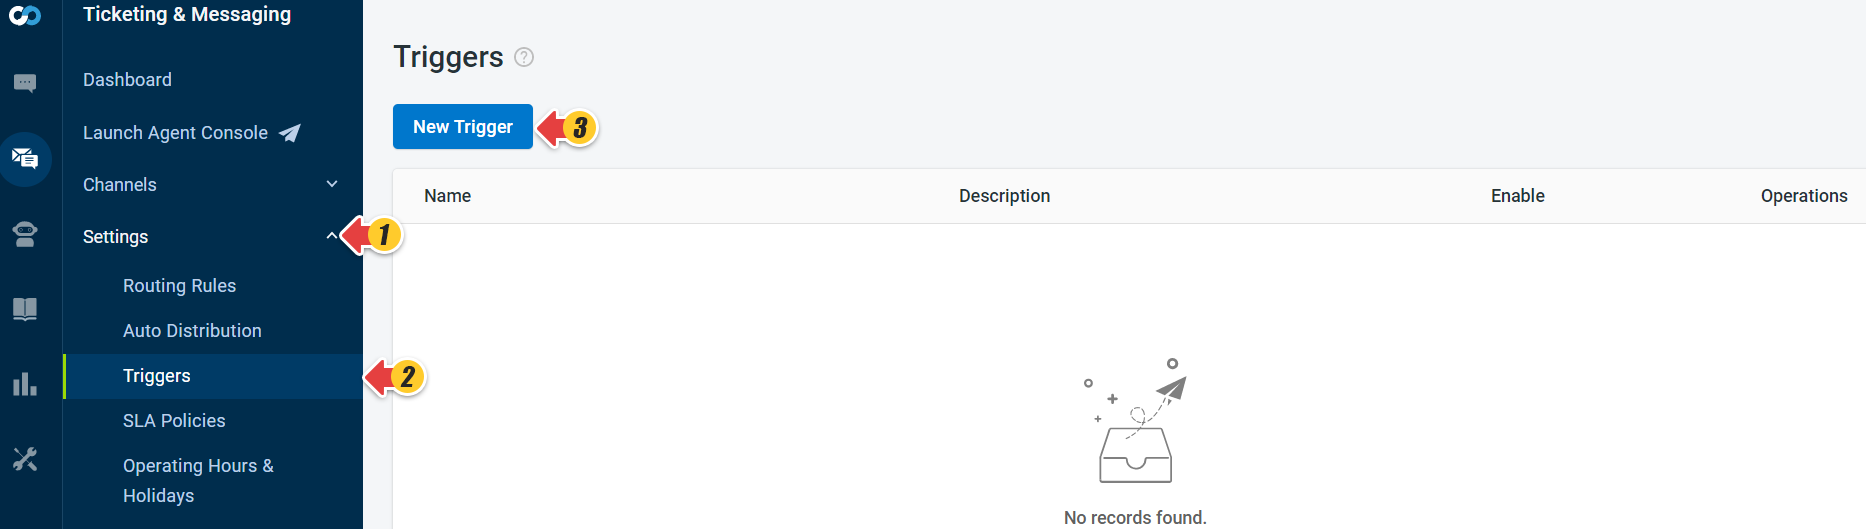
- Log in to the Comm100 Control Panel.
- From the left navigation bar, go to Ticketing & Messaging > Settings > Triggers.
- Click New Trigger.
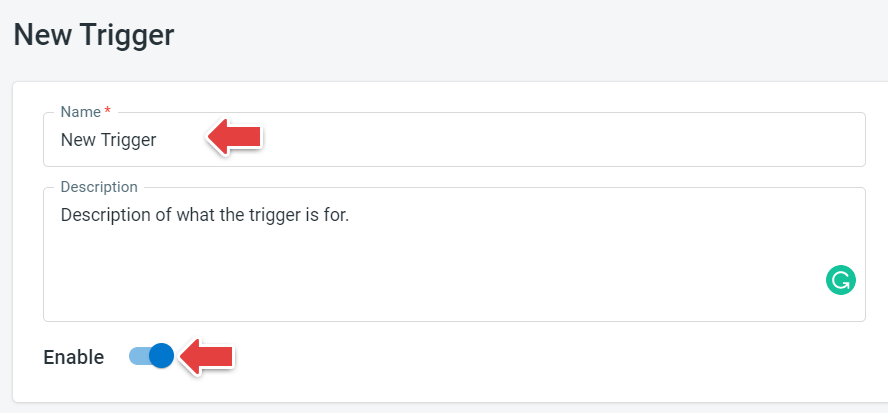
- Name your trigger, use the Description field to describe what the trigger is for, then turn on the Enable toggle key if you want the Trigger to come into effect immediately.
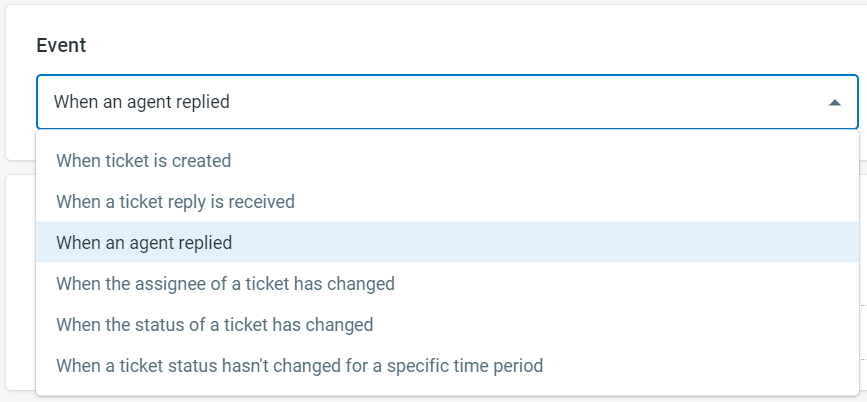
- Adjust when the rule is triggered from the Event section.
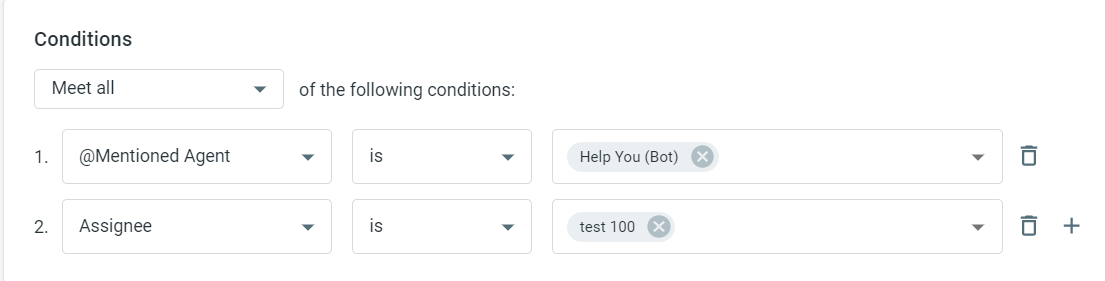
- Add new conditions if required, then go to the Next Trigger Event. Refer to an event for which you want the condition to follow-up actions to occur. When these conditions are fulfilled, actions set in the next step will be triggered. Add multiple events if required by clicking Add.
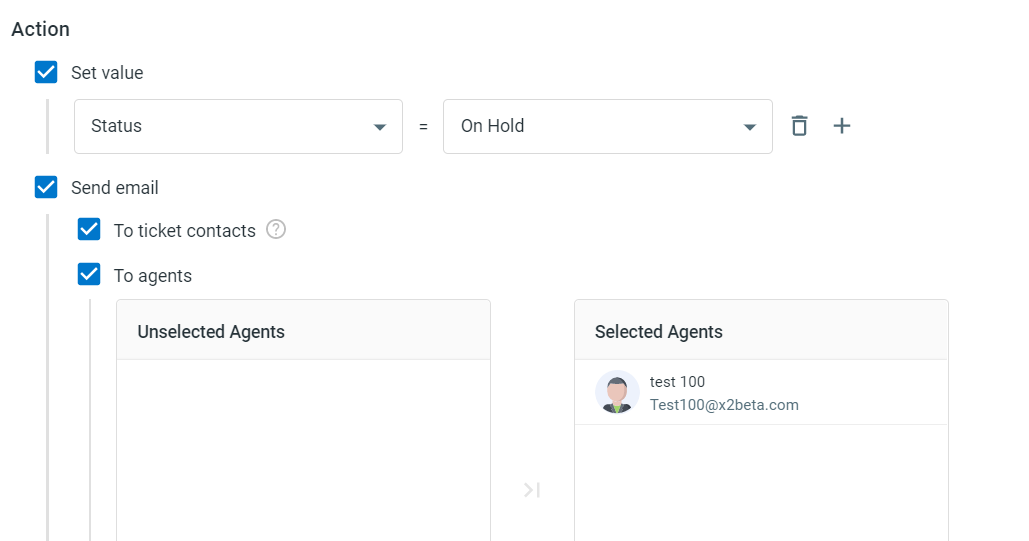
- Now Set the Action to be triggered when the pre-set conditions are met. Actions can be events within Comm100 like Setting a value, shifting a Ticket’s priority, changing the assigned agent/department, or they can be sending a follow-up email.
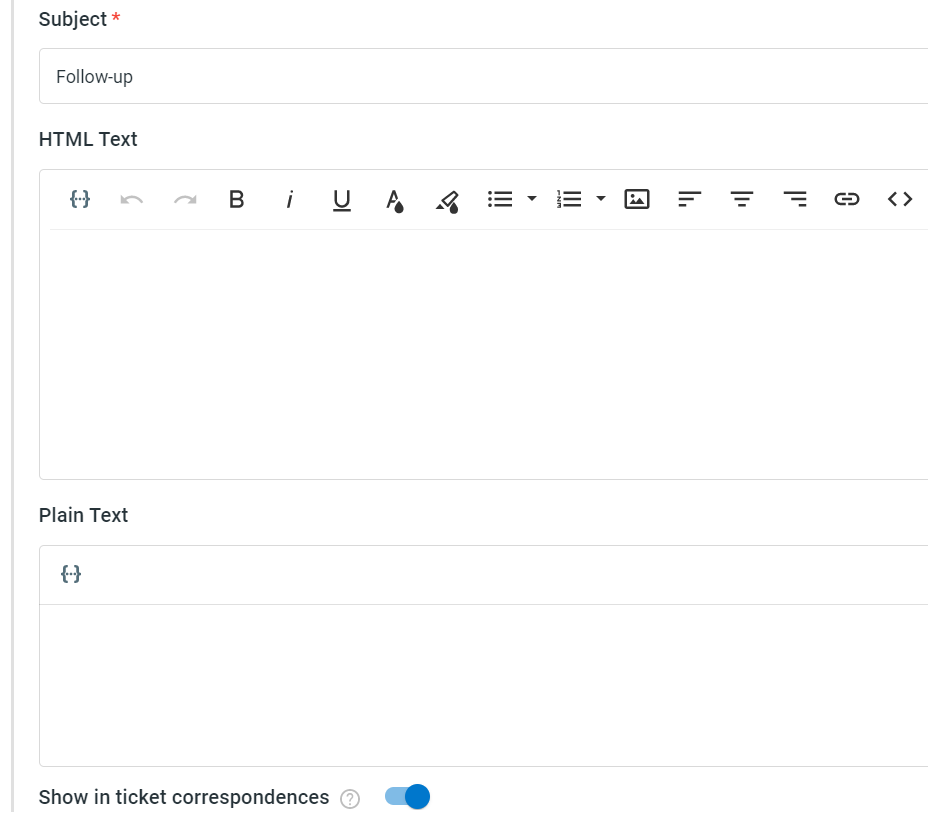
- If you want to send an auto follow-up email to ticket contact(s) or agent(s), the email content can be edited by clicking the button Set Email Content.
That’s it. You’ve successfully created a new trigger. There can be multiple triggers with different conditions. Enable/Disable or edit/remove/copy triggers based on your changing needs.
NOTE: If a ticket meets more than one trigger rule, the triggers will work in sequence based on their display order.