Comm100’s Chatbot is a virtual agent that can answer your visitor's questions. It can also perform tasks like booking a ticket, qualifying leads, and so forth.
It works like a human agent to helps visitors and find solutions to their questions. You can use it in both Live Chat and Ticketing & Messaging Channels.
Benefits of using a Chatbot
The following are multiple benefits of using a Chatbot in your business:
- Faster response time: The Chatbot is like a robot fed with questions and answers. It replies as soon as it sees a visitor on your site, while the agent may take some time to think of a possible solution and type the message.
- Handling capacity/multitasking: There is a limitation to the number of chats an agent can handle at the same time, while the Chatbot can have thousands of simultaneous conversations.
- Cost-effectiveness: Chatbot can do the job of many agents at a time and can be preferred over hiring agents if your revenue is not very high.
To learn more about the benefits of using a Chatbot, see this article.
Using Chatbot in Live Chat
To get the Chatbot working on the Live Chat channel, you must add the Live Chat channel from the Supporting Channels drop-down list from the Bot > Chatbot > Manage Chatbots > Chatbots > Edit Chatbot page for the specific Chatbot.
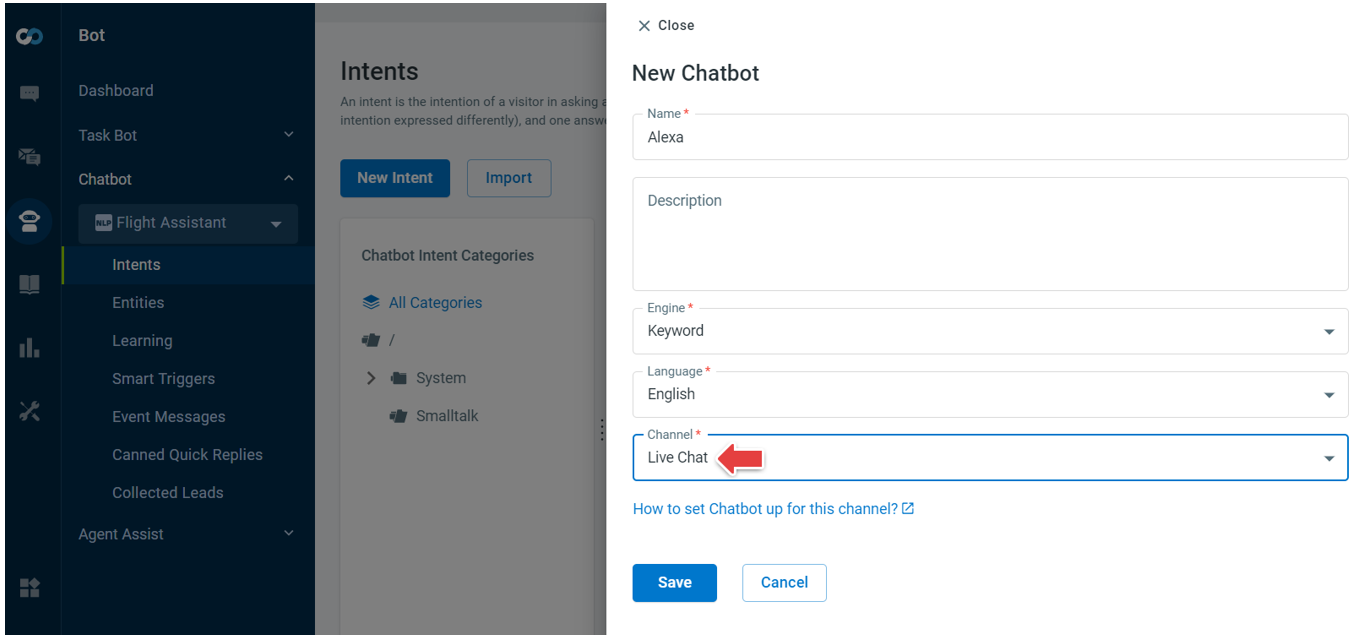
You can also add separate answers for Live Chat in the Answer section of Intents.
To use Chatbot in the Live Chat channel, follow these steps:
- Log in to the Comm100 Control Panel.
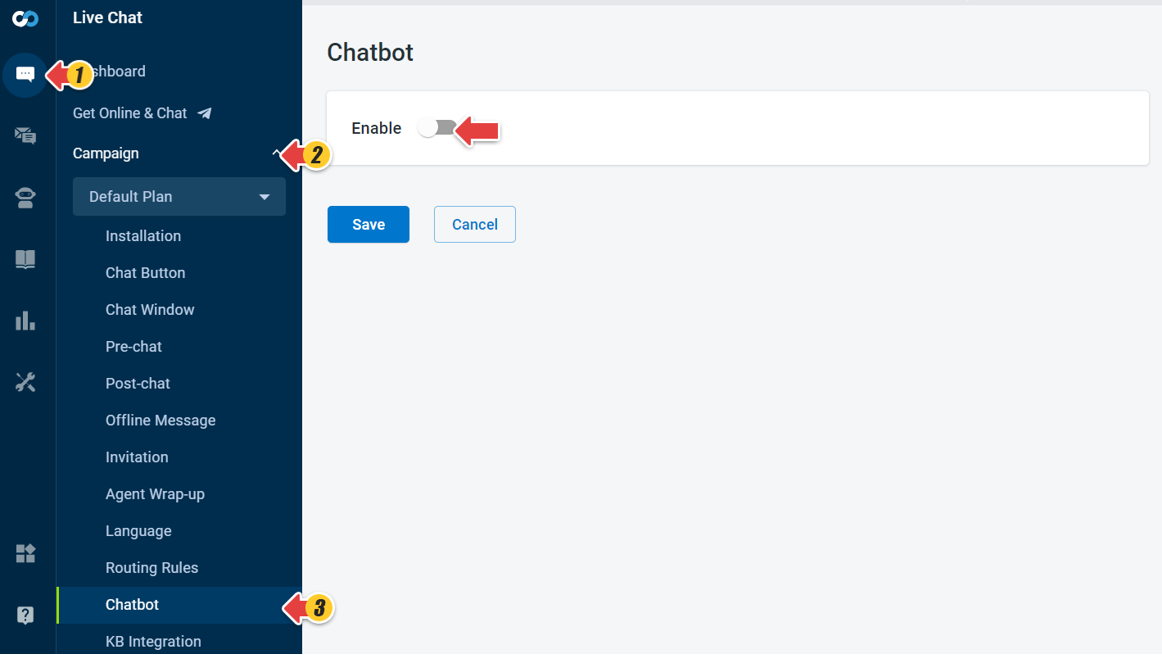
- From the left navigation menu, go to Live Chat > Campaign.
- Select a Campaign from the drop-down list and go to Chatbot.
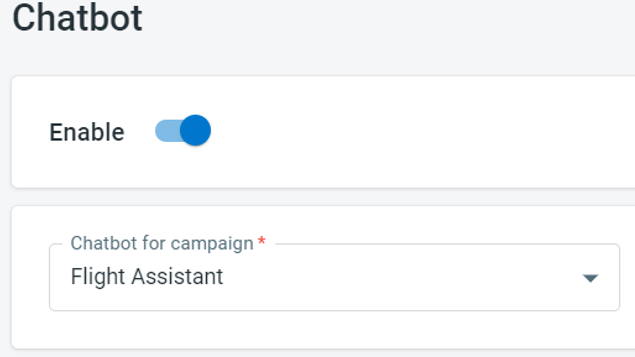
- Turn on the Enable toggle key.
- From the Chatbot for Campaign drop-down list, select a Chatbot.
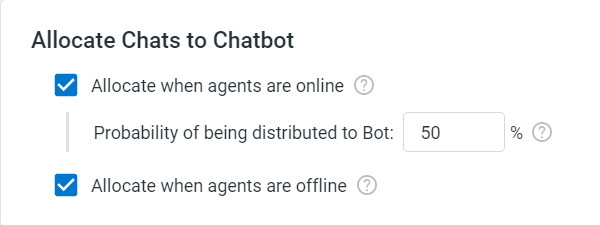
- Define chat distribution to the Chatbot. You can choose to allocate chats to the Chatbot either when agents are online or offline.
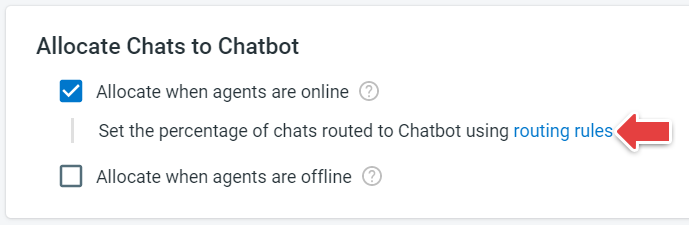
- When agents are online:
You can choose to set a percentage of distribution, the chats get allocated to the Chatbot based on the defined percentage.
Defining this percentage varies if Routing Rules are enabled or disabled in the Live Chat Campaign setting.
If your routing rules are enabled from Live Chat > Campaign > Routing Rules, click the routing rules link on the Chatbot page and set the distribution.
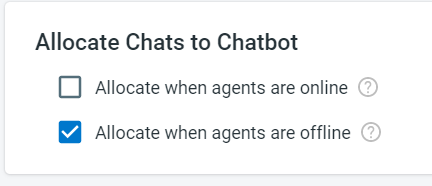
If routing rules are disabled, you can set the distribution percentage on the same Chatbot page. - When agents are offline:
All chats are allocated to the Chatbot in this case.
- When agents are online:
- Click Save.
Using the Chatbot in Ticketing & Messaging
To get the Chatbot working on the Ticketing & Messaging channels, you select the bot from the Ticketing & Messaging > Channels > [Channel Name] > Bot Configuration > Edit Bot Configuration for the specific Chatbot.
You can also add separate answers for the respective channels in the Answer section of Intents.
To use Chatbot in Ticketing & Messaging channels, follow these steps:
- Log in to your Comm100 Control Panel.
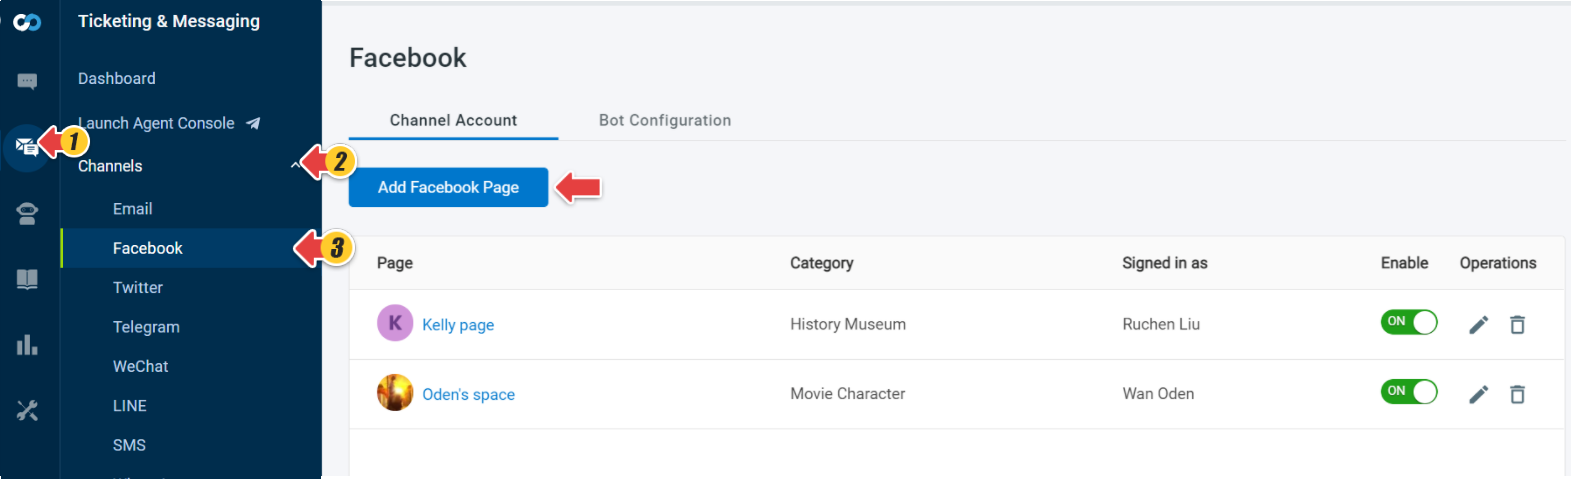
- From the left navigation menu, go to Ticketing & Messaging > Channels.
- Go to a messaging channel.
- In the Channel Account tab, add the respective account for Facebook, Twitter, and so forth.
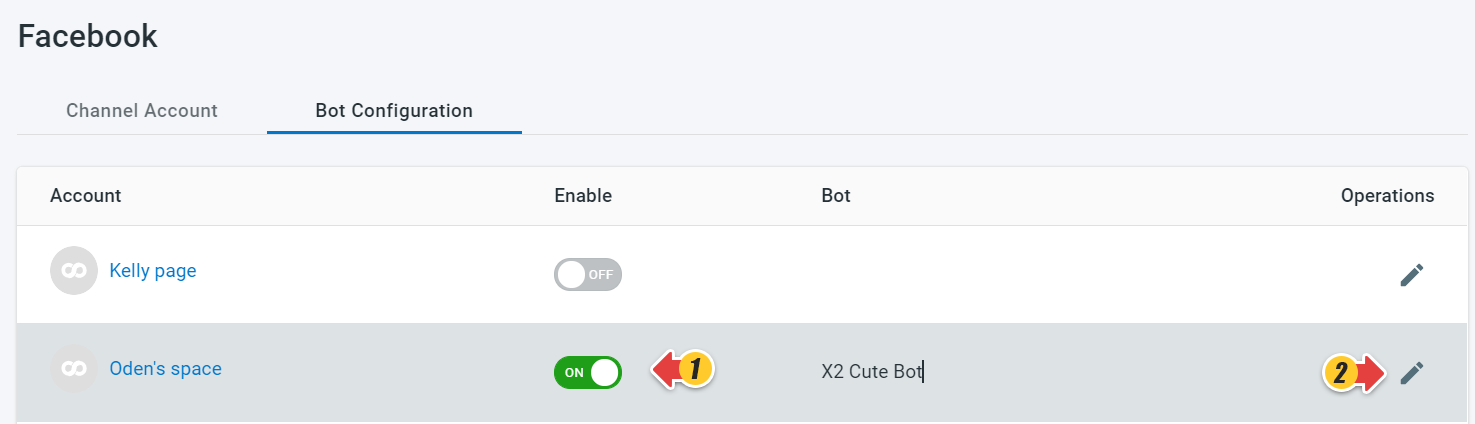
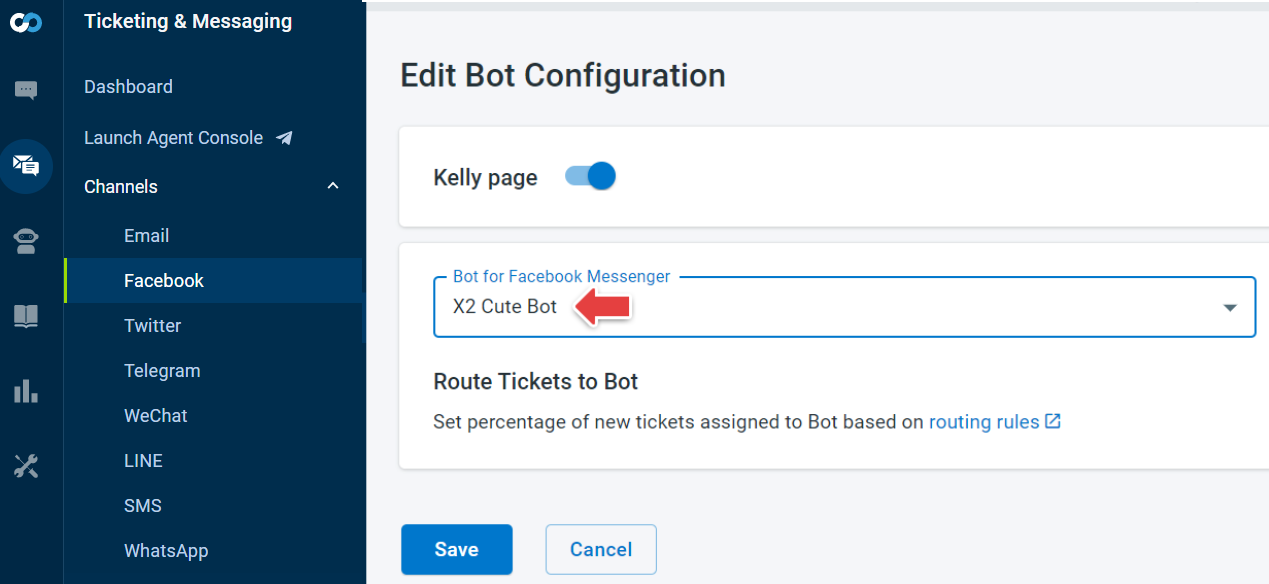
- Go to the Bot Configuration tab.
- Turn ON the Enable toggle key to enable the Bot.
- Click the Pencil icon under the Operations header.
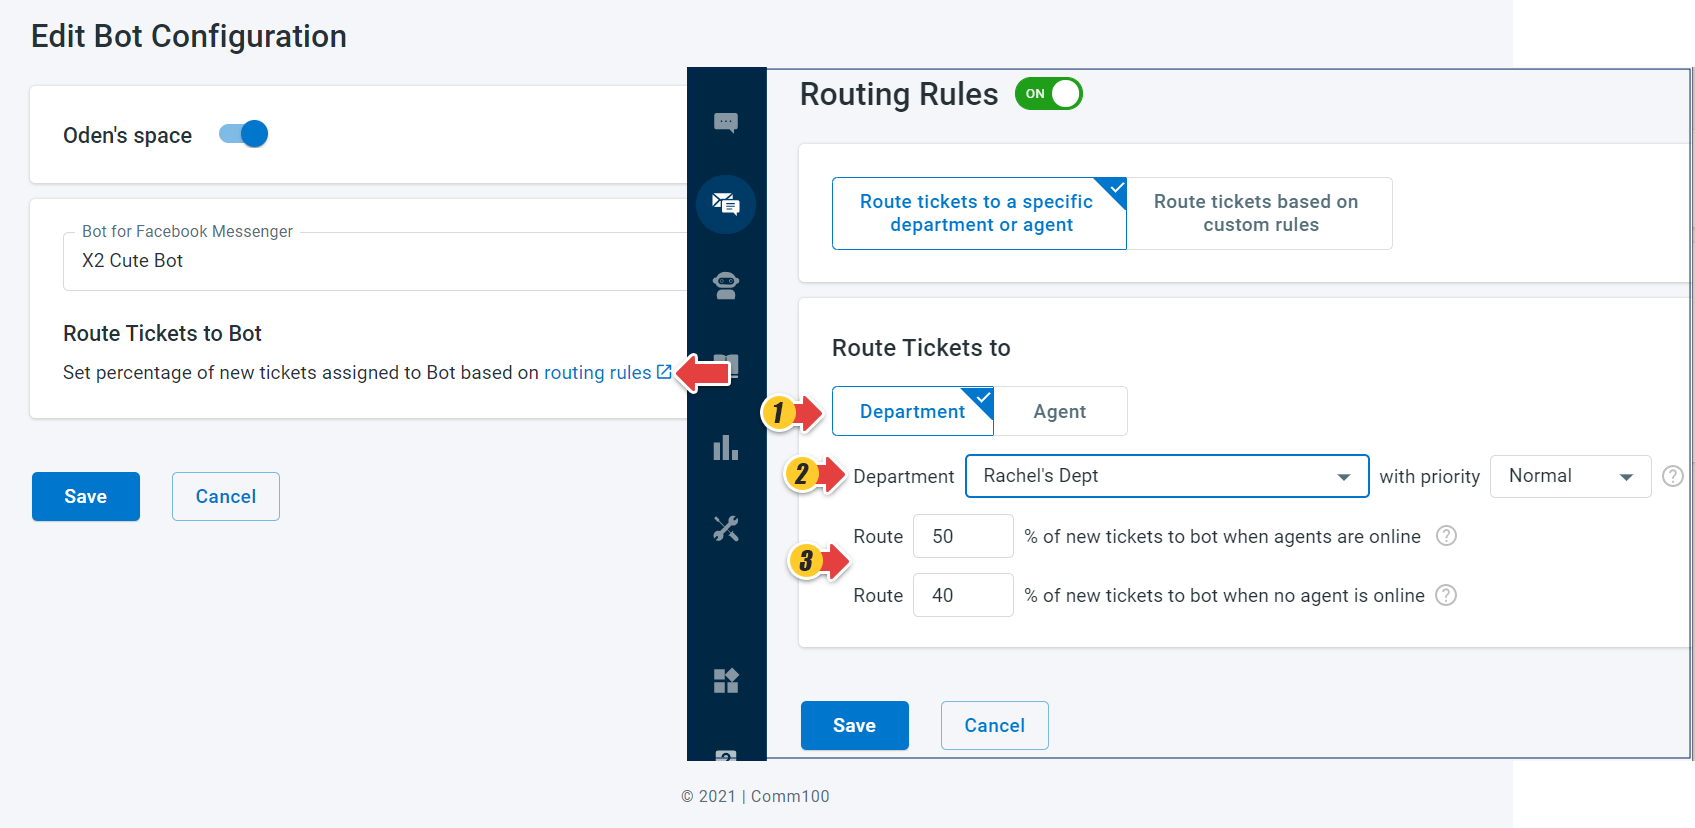
- From the Edit Bot Configuration page, select the Bot for [channel] in the drop-down list.
- Route Tickets to the Bot. This can be done in two ways:
- Routing Rules are enabled from Settings: If your routing rules are enabled from Ticketing & Messaging > Settings > Routing Rules, click the routing Rules link in the Edit Bot Configuration page and set the distribution. Choose route tickets to a specific department or agent or choose to route tickets based on custom rules on the Routing Rules page. Set the percentage of tickets when the agent is online or offline.
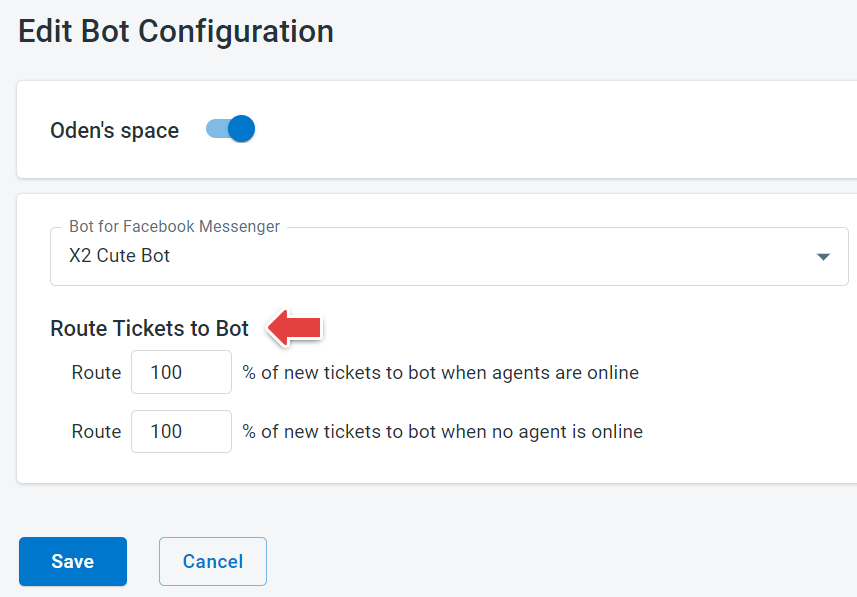
- Routing Rules are disabled from Settings: If the routing rules are disabled, allocate tickets to the bot by percentage, for cases when agents are online or offline in the Bot Configuration tab.
- Routing Rules are enabled from Settings: If your routing rules are enabled from Ticketing & Messaging > Settings > Routing Rules, click the routing Rules link in the Edit Bot Configuration page and set the distribution. Choose route tickets to a specific department or agent or choose to route tickets based on custom rules on the Routing Rules page. Set the percentage of tickets when the agent is online or offline.
- Click Save.